I promised this post to some people several weeks ago. But I'm a slacker! Sorry!
Favorite sourdough websites (click on names to go to the websites; I linked them to where they talk about sourdough):
King Arthur Flour They have great info and recipes
Cultures for Health
Articles with lots of great tips
Kitchen Stewardship
The easy way to make a starter, and recipe links at the bottom of the page
GNOWFGLINS
This link is to a video with information on how to make a starter (and I think some benefits of sourdough?)
Sourdough Home
Basic Information:
How to feed sourdough starter and maintain it in the fridge
Favorite Recipes: (First I must say that these are my favorite recipes. My husband does not like sourdough, at this time. My goal is to become more proficient in it so that it's not quite so sour, and my husband will like it. This will be an ongoing list, so as I find new recipes that I like, or recipes that I like better than the one I have linked here I will change them.)
Bread
Crackers
Crepes (yes, this is the right link-I have never fried them for tortilla chips-my husband does like this recipe)
Pancakes (I like the recipe down near the bottom of this page)
Pizza Crust
Waffles
Do you have a favorite sourdough recipe? Let me know!
Showing posts with label Recipes. Show all posts
Showing posts with label Recipes. Show all posts
September 3, 2012


February 10, 2012
Baked Oatmeal and Bagels
Just wanted to share a few of my family's new favorite recipes with you.
Baked Soaked Oatmeal-This recipe has become a Saturday morning tradition. Soaking is great for your grains so that you get more nutrition from them. This recipe is adapted from Kelly the Kitchen Kop.
Baked Soaked Oatmeal
Whole Wheat Bagels-I made these bagels a few weeks ago. So good! They take quite a bit effort since I had to broil, boil, and bake them. What a fun treat, though!
Baked Soaked Oatmeal-This recipe has become a Saturday morning tradition. Soaking is great for your grains so that you get more nutrition from them. This recipe is adapted from Kelly the Kitchen Kop.
Baked Soaked Oatmeal
- 2-1/2 c. oats
- 1 T. whole wheat flour (provides phytase to help break down the phytic acid in the oats)
- 1-3/4 c. buttermilk
- ½ c. melted butter, coconut oil, or canola oil
- 4 eggs (or 1/4 cup powdered eggs)
- ½ c. honey, maple syrup, or sugar
- ½ tsp. salt
- 2 tsp. Cinnamon
- 2 tsp. Vanilla
- 2-4 cups fresh or dried fruit (dried apples, raisins, apples, pears, etc.)
- Optional: 2 c. chopped nuts (or sprinkle on each individual serving after baking)
Whole Wheat Bagels-I made these bagels a few weeks ago. So good! They take quite a bit effort since I had to broil, boil, and bake them. What a fun treat, though!
January 31, 2012
How I Make Yogurt
Yogurt! This has become a favorite for me over the past year, as it is easy and healthy. I can't believe that just a year ago I hated the stuff. In the past I typically made it with powdered milk from the Home Storage Center (LDS cannery). I am making the change to using more and more milk instead for health reasons, and because my husband thinks it tastes better. He'll eat my powdered milk yogurt in smoothies or with vast amounts of fruit. My two year old loves my yogurt completely plain. I don't like it plain, but I'll eat it with fruit or as a substitute for sour cream (such as on enchiladas or potatoes). I am also using more milk because it makes much better tasting yogurt cheese (like cream cheese)-a new family favorite.
I'll begin with the basics, then give more details on how I make it using powdered milk.
Update: I now only make it with whole milk and it is so yummy!
1. Heat milk to 180 F.
2. Lower temperature of milk to about 115.
3. Add yogurt with live cultures.
4. Keep milk between 90-115 for 6-12 hours. The idea here is to allow the healthy bacteria to multiply (pleasant thought!). If the temperature is lower than this, the bacteria will stop multiplying. If the temperature is too high, the bacteria will be killed.
5. Refrigerate yogurt for 8 hours.
6. Enjoy!
Plain Yogurt
8 cups water
powdered milk to reconstitute water, plus a little more (2 cups from Home Storage Center)
1/4 cup plain yogurt with live cultures (store bought or saved from a previous batch)
1, Heat water in a crockpot on high for 1 hour. Stir in powdered milk; mix well. Heat on low for 1/2 hour. Temperature of milk should now be 180. If too low, keep heating.
2. When milk reaches 180, unplug crockpot. Cool for about 2 hours, or until milk reaches about 115. Update: To ensure thick yogurt, don't add the yogurt until the milk has lowered to 110 degrees.
3. Stir in yogurt.
4. Wrap crockpot in a towel or two to insulate. Allow to sit for 6+ hours, until the yogurt is firm. (Sometimes I let it sit for nearly 20 hours. This is okay, because yogurt is cultured. It won't hurt you to eat yogurt that's sat out for a day.)
5. Scoop yogurt into containers. (You may have some watery looking substance at the very top, or the bottom may not be quite as solid as the rest. This is okay. The watery substance at the top is whey. If you don't want to eat it, add it to your bread, or save it to soak your oatmeal.) Be sure to scoop 1/2-1 cup into a separate container to use as the starter for your next batch. Refrigerate for at least 6-12 hours before eating.
I have made this recipe about once each week for about 6 months without having any botched batches. If you have problems let me know, so I can help troubleshoot.
Update: Click Here for Directions on how to make your yogurt thicker.
I'll begin with the basics, then give more details on how I make it using powdered milk.
Update: I now only make it with whole milk and it is so yummy!
1. Heat milk to 180 F.
2. Lower temperature of milk to about 115.
3. Add yogurt with live cultures.
4. Keep milk between 90-115 for 6-12 hours. The idea here is to allow the healthy bacteria to multiply (pleasant thought!). If the temperature is lower than this, the bacteria will stop multiplying. If the temperature is too high, the bacteria will be killed.
5. Refrigerate yogurt for 8 hours.
6. Enjoy!
Plain Yogurt
8 cups water
powdered milk to reconstitute water, plus a little more (2 cups from Home Storage Center)
1/4 cup plain yogurt with live cultures (store bought or saved from a previous batch)
1, Heat water in a crockpot on high for 1 hour. Stir in powdered milk; mix well. Heat on low for 1/2 hour. Temperature of milk should now be 180. If too low, keep heating.
2. When milk reaches 180, unplug crockpot. Cool for about 2 hours, or until milk reaches about 115. Update: To ensure thick yogurt, don't add the yogurt until the milk has lowered to 110 degrees.
3. Stir in yogurt.
4. Wrap crockpot in a towel or two to insulate. Allow to sit for 6+ hours, until the yogurt is firm. (Sometimes I let it sit for nearly 20 hours. This is okay, because yogurt is cultured. It won't hurt you to eat yogurt that's sat out for a day.)
5. Scoop yogurt into containers. (You may have some watery looking substance at the very top, or the bottom may not be quite as solid as the rest. This is okay. The watery substance at the top is whey. If you don't want to eat it, add it to your bread, or save it to soak your oatmeal.) Be sure to scoop 1/2-1 cup into a separate container to use as the starter for your next batch. Refrigerate for at least 6-12 hours before eating.
I have made this recipe about once each week for about 6 months without having any botched batches. If you have problems let me know, so I can help troubleshoot.
Update: Click Here for Directions on how to make your yogurt thicker.
July 9, 2011
Introducing Quinoa!

I cooked quinoa (a very healthy grain) earlier this week for the first time. My husband has never had a good thing to say about quinoa, but liked this meal. One big hint I learned is to cook it in broth. This gives it so much more flavor. Otherwise it is very bland.
I found this Mango Quinoa Salad recipe at ourbestbites.com. I didn't think I'd make it any time soon, because quinoa is not cheap. In fact it is expensive. But when I saw that Lee's had red peppers and mangoes on sale, I couldn't resist. More information on quinoa can be found here.
June 17, 2011
How to Make a Green Smoothie
I make a very simple green smoothie. There are better ways of making them that add more nutrition, but I like it simple and cheap.
Place a handful of spinach in a blender. Add yogurt. Then pile in some fruit. I use anything I have on hand; this may be fresh, frozen, or canned. I like using at least 3 different types of fruit. Then I blend it up real well. If it's too thick, I add juice or milk. If it's not sweet enough I add honey. Enjoy!
Tip: If you add fruit, you can't taste the spinach at all.
Place a handful of spinach in a blender. Add yogurt. Then pile in some fruit. I use anything I have on hand; this may be fresh, frozen, or canned. I like using at least 3 different types of fruit. Then I blend it up real well. If it's too thick, I add juice or milk. If it's not sweet enough I add honey. Enjoy!
Tip: If you add fruit, you can't taste the spinach at all.
June 6, 2011
Springtime
It is finally spring where I live. Well, I suppose it's been spring for a while, but it is finally a nice spring where I can actually go outside. The rest of the spring was very wet and rather chilly. This is the reason that I haven't posted very much the past couple of weeks: I've been outside and in the kitchen. Here are a few preparedness related activities that I have been busy with. Perhaps it may give you some ideas.
- Gardening. I am really excited about my garden this year. My sister is gardening with me. We are almost done planting, and have begun harvesting spinach. I love green smoothies!
- Rhubarb. I have made rhubarb jam, rhubarb pie, easy rhubarb dessert, rhubarb syrup, and am in the middle of making rhubarb juice.
- Dehydrating herbs-dill, chives, and parsley.
- Grilling. Thanks to the really cheap hamburgers I bought. I have made hamburger buns, pasta salad with beans, dutch oven potatoes, coleslaw, and baked beans to go along with the hamburgers or grilled chicken.
May 2, 2011
When Tornadoes Hit--Staying Gluten Free in an Emergency
I receive a weekly gluten free online newsletter. With permission, I share last Friday's (April 29, 2011) newsletter. Although she is speaking specifically of gluten free foods, it all applies to everyone, regardless of what we typically eat.
Staying Gluten Free in an Emergency
Yesterday my husband and I drove through the community of
Phil Campbell Alabama. An enormous tornado whipped through
that town Wednesday afternoon and miles and miles of homes
were completely destroyed. We didn't even realize that we
were getting close to the town as we drove because all of the
physical landmarks were completely gone. Homeowners stood by
the road looking at a landscape of debris trying to figure out
what to do next. And unfortunately, the same sort of scene
could be found throughout Alabama yesterday.
Our house did not sustain any damage - a tornado went by in
the air early Wednesday morning while we were asleep and a
tree fell to within feet of our home. As I saw the
destruction yesterday and read more coverage online, I began
to think about whether our pantry reserves are large enough
and whether we were prepared to obtain and cook gluten free
food during an extended emergency period. Unfortunately, the
answers were "No" and "No".
Here are a few lessons learned from our experience.
Lesson #1: Having cash on hand is essential.
We use debit cards or online banking for 99% of our
transactions. However, when the power is out debit cards and
online banking are useless. And unless your bank has a
generator you won't be able to get cash from the bank or ATM.
We ate breakfast at Waffle House on Wednesday morning (beware
cross-contact from the grill) and they let us leave a check
until we were able to get cash from an ATM and come back and
pay our bill.
Lesson #2: Food preservation requires planning.
I was pleased that we were able to salvage most of the food in
our refrigerator and freezer. We have one large cooler and I
packed it full with frozen fruits and vegetables and the
refrigerator perishables. There was enough frozen food that
we didn't need (or have room for) ice, but everything kept
cool for two days.
In the past we've stored lots of food in an upright
freezer. I'm not longer a fan of this because there is the
potential to lose so much food in a power outage. Unless a
generator is available, I think canned food storage is the way
to go for food stores that cannot be consumed within 48 hours.
Lesson #3: Heat is required to cook. We
ended up leaving Birmingham and going to my parent's farmhouse
because they have a gas stove. We knew that the power might
be out there, but at least we'd be able to cook easily.
(Little did we know that the tornado devastation near the
farmhouse was much worse than what we had at home).
If that hadn't been available, then we would have needed to cook on the grill. I've done some grill cooking in pots, but not much. It's something that I plan to practice.Perhaps it wouldn't be a bad idea to have a gas campstove available for emergencies. If none of these are an option, then I think it would be good to keep produce on hand that keeps well. We ate a good bit of salad and fresh fruit while the power was out.
If that hadn't been available, then we would have needed to cook on the grill. I've done some grill cooking in pots, but not much. It's something that I plan to practice.Perhaps it wouldn't be a bad idea to have a gas campstove available for emergencies. If none of these are an option, then I think it would be good to keep produce on hand that keeps well. We ate a good bit of salad and fresh fruit while the power was out.
Lesson #4: A stash of GF convenience foods will
keep you sane. I don't keep a lot of GF processed
foods on hand. We're not eating a lot of grain-based foods
right now, and when we do I generally make it by hand. That
being said, I was very grateful for my Mom's stash of GF food
that she keeps at the farm. It was so helpful to be able to
whip up a batch of GF pancakes for the kids on Thursday
morning (Thank you, Betty Crocker and Mom).
John and I talk a good bit about gluten free food stashes
in our ebook, The Gluten Free Survival Guide.
After the past two days, I think we need to restock the food
stash in the Yukon. Cheetos, nuts, juice boxes, and bottled
water go a long way towards keeping everyone happy if you need
to drive out of a disaster area. (On that note, I'm also
thinking that I'd like to keep more gas in the Yukon)
Lesson #5: Be prepared for the long-haul
Between my pantry and the food Mom had left at the farm, I was
able to cook very good meals without doing any shopping for
two days. However, if we had been without power for a longer
period, then we would have been having some very strange meals
and run out of food pretty quickly. Some communities in
Alabama will not have power for at least a week (the main
transmission lines in many areas of the state were
destroyed). Ice storms in the winter can knock out the power
for two - three weeks.
Based on my experience this week I can count on frozen food
for 2 days refrigerator food for 2 - 3 days, fresh produce for
2 - 5 days, and canned food indefinitely.
Peanut Butter Chocolate Chip Cookies
I've sent this recipe out before, but it's such a good
one. Only 4 ingredients, and it's stuff that you usually have
around the house. As long as you have a gas stove (or can
figure out how to bake over a grill), then this cookies will
go a long way towards cheering you up.
1 c. sugar
1 c. peanut butter
1 large egg
1 c. peanut butter
1 large egg
1/4 - 1/2 c. chocolate chips
Mix sugar, peanut butter and egg together until thoroughly
combined. Stir in chocolate chips and refrigerate for 15
minutes. Drop spoonfuls of cookie dough onto a baking sheet.
If you put plenty of space between them then they are less
likely to run together.Bake at 350 for approximately 15
minutes (but it may take more). The will be slightly browned,
but still soft when they are done. Let them cool for a few
minutes before removing them from the bakings sheet and they
will harden up a bit.
Hopefully we'll be back to a somewhat normal schedule next week. We are having a huge yard sale this weekend to sell all of the stuff that we won't be taking with us when we move. It's been amazing to see how much stuff we've put into the garage and haven't missed at all. However, due to the two days that were lost due to power outages, John and I have a ton of work to do tonight to get everything ready.
April 7, 2011
Yogurt Update
Last week I tried making yogurt in a crockpot, according to the recipe at Everyday Food Storage. At first I thought the idea was kind of silly. Why heat milk for hours in the crockpot when I can heat it on the stove in a fraction of the time? The only reason is because this makes it a great one pot dish. I used far less dishes by making it start-to-finish in the crockpot. The other great thing was that I didn't have to worry about balancing jars in water in the cooler or my kids dumping the cooler over. The best part of all was that I only let the yogurt sit and cultivate and breed all of that good bacteria for 7 hours. In the past I've always done that for 12. The result was that the yogurt wasn't nearly as tart. It tasted so good! My husband even admitted that "it's good for plain yogurt." My mom liked it better than the plain yogurt she buys at the store. This is a keeper method! Check it out here.
March 23, 2011
Homemade Yogurt
I have been making yogurt the past couple of months. I was hesitant. I don't like plain yogurt. Why on earth would I make some? Yes, I know it's healthy. But it's sour. It doesn't taste good.
Now that I'm 2 or 3 months into it, I like it. My taste buds have changed. I don't mind the sour. When I eat it as a snack I add granola, jam (especially rhubarb pineapple jam), applesauce, canned fruit along with the syrup (especially home-canned plums), or some combination of these. It's good. My favorite way to eat it is with applesauce on pancakes. I also eat it instead of sour cream on tacos and chili. I really like it in smoothies with fresh and/or frozen fruit (if it's too sour, I add a little honey; too thick, a little milk or juice).
Yogurt is easy to make. It takes about 12 hours to make, but only about 13 minutes of active time.
You can use any type of milk. If you use powdered milk from the LDS cannery, it will be very sour. Regular milk from the store is not quite so sour. Morning Moo's milk alternative does not work just by itself. It does work 1/2 and 1/2 with other milk (powdered or regular).
Here is a brief synopsis of how to make 2 quarts of plain yogurt:
1. Heat 8 cups milk to 180° F.
2. Cool milk to 115°.
3. Add 1/2 cup plain yogurt (You want one with lots of LIVE bacteria, and no added ingredients; I use Dannon, then my own homemade)
4. Pour into 3 clean quart-sized jars and screw on clean lids. Try to pour even amounts into each jar.
5. Keep milk between 90°-110° for 8-12 hours to allow bacteria to multiply. I accomplish this by pouring lukewarm tap water into a cooler, and keeping the water between 90° and 110°. I check the water every few hours to make sure it's still warm enough. If it's below 95° I replace half the water with warmer water.
6. When the milk looks like yogurt (hard), put it in the fridge for 12 hours. I like to start the yogurt making process first thing in the morning, then let it refrigerate all night. Fresh yogurt for breakfast!
Prior to making yogurt for the first time, I would highly recommend reading more detailed directions. Use your favorite search engine (I love Swagbucks!) to find one. I used this recipe without any of the sweeteners.
Everydayfoodstorage.net is currently doing a series on yogurt making. The first post has a video with a lot of good information on the health and cost benefits of making your own yogurt. She makes yogurt in a crockpot.
Now that I'm 2 or 3 months into it, I like it. My taste buds have changed. I don't mind the sour. When I eat it as a snack I add granola, jam (especially rhubarb pineapple jam), applesauce, canned fruit along with the syrup (especially home-canned plums), or some combination of these. It's good. My favorite way to eat it is with applesauce on pancakes. I also eat it instead of sour cream on tacos and chili. I really like it in smoothies with fresh and/or frozen fruit (if it's too sour, I add a little honey; too thick, a little milk or juice).
Yogurt is easy to make. It takes about 12 hours to make, but only about 13 minutes of active time.
You can use any type of milk. If you use powdered milk from the LDS cannery, it will be very sour. Regular milk from the store is not quite so sour. Morning Moo's milk alternative does not work just by itself. It does work 1/2 and 1/2 with other milk (powdered or regular).
Here is a brief synopsis of how to make 2 quarts of plain yogurt:
1. Heat 8 cups milk to 180° F.
2. Cool milk to 115°.
3. Add 1/2 cup plain yogurt (You want one with lots of LIVE bacteria, and no added ingredients; I use Dannon, then my own homemade)
4. Pour into 3 clean quart-sized jars and screw on clean lids. Try to pour even amounts into each jar.
5. Keep milk between 90°-110° for 8-12 hours to allow bacteria to multiply. I accomplish this by pouring lukewarm tap water into a cooler, and keeping the water between 90° and 110°. I check the water every few hours to make sure it's still warm enough. If it's below 95° I replace half the water with warmer water.
6. When the milk looks like yogurt (hard), put it in the fridge for 12 hours. I like to start the yogurt making process first thing in the morning, then let it refrigerate all night. Fresh yogurt for breakfast!
Prior to making yogurt for the first time, I would highly recommend reading more detailed directions. Use your favorite search engine (I love Swagbucks!) to find one. I used this recipe without any of the sweeteners.
Everydayfoodstorage.net is currently doing a series on yogurt making. The first post has a video with a lot of good information on the health and cost benefits of making your own yogurt. She makes yogurt in a crockpot.
March 21, 2011
Chili
Chili is great for a number of reasons. According to my husband, you can eat chili all year around, compared to soup that you can only have in the winter. Another great thing about chili is that you can eat it in so many different ways. You can eat it with rice, noodles, baked potatoes, oven fries, french fries, Doritos (according to my husband), fry bread, or hot dogs; you can serve it with all kinds of toppings, such as cheese, sour cream, plain yogurt, chopped onions, tomatoes, lettuce, etc.
Here is a very basic recipe. You can add chopped celery and/or green peppers if you like. The recipe calls for pinto beans, but I have also used kidney, black, and great northern beans. I like using multiple kinds in the same recipe to add variety. This recipe freezes well.
Chili
1 lb dry pinto beans OR 3 cans beans
1 lb ground beef
1 large onion, chopped
3 cans (14.5 oz) chopped tomatoes
1/2 tsp garlic salt
1 1/2-2 1/2 tsp salt
1/2- 1 Tbs chili powder
Cook dry beans. When beans are recipe-ready, cook ground beef and onions until meat is cooked, and onions are soft. Drain excess fat. Add remaining ingredients. Cover and simmer 1-2 hours.
Here is a very basic recipe. You can add chopped celery and/or green peppers if you like. The recipe calls for pinto beans, but I have also used kidney, black, and great northern beans. I like using multiple kinds in the same recipe to add variety. This recipe freezes well.
Chili
1 lb dry pinto beans OR 3 cans beans
1 lb ground beef
1 large onion, chopped
3 cans (14.5 oz) chopped tomatoes
1/2 tsp garlic salt
1 1/2-2 1/2 tsp salt
1/2- 1 Tbs chili powder
Cook dry beans. When beans are recipe-ready, cook ground beef and onions until meat is cooked, and onions are soft. Drain excess fat. Add remaining ingredients. Cover and simmer 1-2 hours.
March 15, 2011
Orange Cleaner
Have you been eating tons of oranges lately? Here's something to do with the peels! Just put them in a jar, cover with vinegar, let sit a couple of weeks, then use as a cleaner! It works great! The full recipe can be found here at Penniless Parenting.
March 14, 2011
Rice with Lentils
Another way I like to serve lentils is with rice. I just cook rice in my rice cooker like usual, except I substitute a tablespoon or two of lentils for rice. It is so easy, good, and adds nutrition to a quick and easy side dish. I first learned this while living with foreign exchange students in college. (I think the ones who did this were from Korea. It's been a while, though, so I can't quite remember.)
March 9, 2011
Mexican Pizza
I really like lentils. They are not a bean, but they are in the legume family, along with beans, so I just call them beans. They only take about 25 minutes to cook, and do not need to be soaked first. Most every recipe that I've tried them in, though, has been just okay. Not terrific, but edible. I've tried lentil loafs, soups, and chili. This recipe, though, is a family favorite. I always dream of making it healthier by using homemade corn tortillas in place of chips, but that just hasn't happened yet.
I don't really measure the ingredients. I just throw it together. The measurements below are estimates. Just do what looks good.
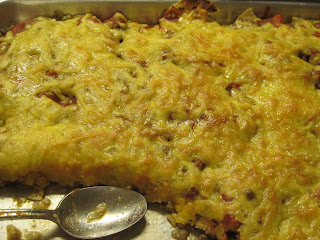
Mexican Pizza
3 cups cooked lentils
1 can Spaghetti sauce OR tomato sauce seasoned to taste with salt, pepper, and garlic powder or beef flavored bouillon
1/2 pound Cheddar or Monterey Jack cheese, shredded
1 bag tortilla chips
Lay tortilla chips on cookie sheet. Can crush for easier eating. Spoon lentils over chips, followed by
spaghetti sauce. Or crush lentils and mix with sauce. Sprinkle cheese over top. Broil until cheese is
melted, about 3 minutes. Serve with salsa and sour cream. You may also use olives, green onions, or peppers on top of the cheese, if desired.
I don't really measure the ingredients. I just throw it together. The measurements below are estimates. Just do what looks good.

Mexican Pizza
3 cups cooked lentils
1 can Spaghetti sauce OR tomato sauce seasoned to taste with salt, pepper, and garlic powder or beef flavored bouillon
1/2 pound Cheddar or Monterey Jack cheese, shredded
1 bag tortilla chips
Lay tortilla chips on cookie sheet. Can crush for easier eating. Spoon lentils over chips, followed by
spaghetti sauce. Or crush lentils and mix with sauce. Sprinkle cheese over top. Broil until cheese is
melted, about 3 minutes. Serve with salsa and sour cream. You may also use olives, green onions, or peppers on top of the cheese, if desired.
March 4, 2011
Vegetable Soup
This recipe is adapted from "Cook's Country" magazine.
Very Yummy Vegetable Soup
Printable Version
2 Tab. vegetable oil
4 large carrots, peeled and cut into 1/4 inch pieces
2 small onions, peeled and cut into 1/2 inch pieces
6 garlic cloves, minced
8 cups broth (I use water and bouillon-both chicken and vegetable work well)
3 medium russet potatoes, peeled and cut into 1/2 inch pieces
1/4 tsp EACH thyme and rosemary
2 slices bread, lightly toasted (white is best, but wheat is okay; try not to use something with too much flavor)
Spinach (I usually use frozen-just cut off a hunk of a block; fresh chopped up works great, too)
1 can white beans (2 cups)
10 oz. frozen peas
Balsamic vinegar
Salt and pepper
1. Heat oil in heavy-bottomed pot over medium-high heat. Add carrots and onions, and cook until browned and softened, 5-7 minutes. Add garlic and cook until it smells wonderful, about 30 seconds. Add broth (or water and bouillon), potatoes, thyme, and rosemary. Bring to boil. Reduce heat to low, cover, and simmer until vegetables are soft, 10-15 minutes.
2. Transfer 3 cups solids (estimate), 1 cup broth, and bread to blender and puree until smooth. Stir puree back into pot. Add spinach, beans, and peas. Cook over medium heat until spinach is tender, and peas are heated through, about 8 minutes. Stir in 1 tablespoon vinegar and season to taste with salt and pepper. Serve, passing extra vinegar at table.
Very Yummy Vegetable Soup
Printable Version
2 Tab. vegetable oil
4 large carrots, peeled and cut into 1/4 inch pieces
2 small onions, peeled and cut into 1/2 inch pieces
6 garlic cloves, minced
8 cups broth (I use water and bouillon-both chicken and vegetable work well)
3 medium russet potatoes, peeled and cut into 1/2 inch pieces
1/4 tsp EACH thyme and rosemary
2 slices bread, lightly toasted (white is best, but wheat is okay; try not to use something with too much flavor)
Spinach (I usually use frozen-just cut off a hunk of a block; fresh chopped up works great, too)
1 can white beans (2 cups)
10 oz. frozen peas
Balsamic vinegar
Salt and pepper
1. Heat oil in heavy-bottomed pot over medium-high heat. Add carrots and onions, and cook until browned and softened, 5-7 minutes. Add garlic and cook until it smells wonderful, about 30 seconds. Add broth (or water and bouillon), potatoes, thyme, and rosemary. Bring to boil. Reduce heat to low, cover, and simmer until vegetables are soft, 10-15 minutes.
2. Transfer 3 cups solids (estimate), 1 cup broth, and bread to blender and puree until smooth. Stir puree back into pot. Add spinach, beans, and peas. Cook over medium heat until spinach is tender, and peas are heated through, about 8 minutes. Stir in 1 tablespoon vinegar and season to taste with salt and pepper. Serve, passing extra vinegar at table.
March 1, 2011
Homemade Cream of Chicken Soup
I have tried a number of homemade cream of chicken soup recipes. This recipe from USU Extensions is my favorite and the easiest. I have used both non-instant powdered milk (from the LDS cannery), and Morning Moo's milk alternative for the powdered milk. I have used both chicken and vegetable bouillon. All of these have produced good results. I have used this recipe in chicken enchiladas, white chili, stroganof, and several other recipes that call for cream of chicken soup that I just can't think of right now. The great part of making your own soup instead of using a can, is that you can season it the way you like. When making stroganof, for example, I season it with parsley, dry mustard, oregano, pepper, and sugar. Use your imagination!
This is also very cost effective. When using a #10 can of non-instant dry milk that cost $7.90, a 16 oz. container of cornstarch that cost $1, and a mega-huge 35.3 oz. container of chicken bouillon that cost $4.98, a can of cream of chicken soup costs 18.66¢.
USU extensions says this recipe can also be used as a soup by mixing the recipe below with cheese, potatoes, broccoli and cheese, etc. I've never tried this.
Basic Sauce Mix (Cream of Chicken Soup)
2 cups powdered non-instant milk (see note above)
3/4 cup cornstarch
1/4 cup bouillon (see note above)
Combine all ingredients in a plastic bag. Seal and shake to mix well. Yield: Equal to 9 cans of cream soup.
To substitute for 1 can of cream soup: Combine 1/3 cup of dry mix with 1 1/4 cups cold water. Stir well. Season to taste (depending on recipe). Cook and stir on stove top until thickened. Add thickened mixture to recipe as you would a can of soup.
Use your imagination!
This is also very cost effective. When using a #10 can of non-instant dry milk that cost $7.90, a 16 oz. container of cornstarch that cost $1, and a mega-huge 35.3 oz. container of chicken bouillon that cost $4.98, a can of cream of chicken soup costs 18.66¢.
USU extensions says this recipe can also be used as a soup by mixing the recipe below with cheese, potatoes, broccoli and cheese, etc. I've never tried this.
Basic Sauce Mix (Cream of Chicken Soup)
2 cups powdered non-instant milk (see note above)
3/4 cup cornstarch
1/4 cup bouillon (see note above)
Combine all ingredients in a plastic bag. Seal and shake to mix well. Yield: Equal to 9 cans of cream soup.
To substitute for 1 can of cream soup: Combine 1/3 cup of dry mix with 1 1/4 cups cold water. Stir well. Season to taste (depending on recipe). Cook and stir on stove top until thickened. Add thickened mixture to recipe as you would a can of soup.
Use your imagination!
February 26, 2011
Vetetable Bouillon
A while back I mentioned that I cook with chicken bouillon quite a bit. One of my readers told me about a vegetable bouillon recipe at a blog called Simple. Healthy. Tasty. I have to admit that I was a little skeptical. First, the main ingredient is nutritional yeast. I had never heard of this. And second, the blogger claims that it tastes like chicken bouillon in recipes. Turns out I didn't have anything to fear!
Nutritional yeast is described here on Wikipedia. It can be bought in bulk bins at WinCo, Smith's Marketplace, and natural food stores.
I like using this bouillon! So far I have used it in stroganof, enchiladas, and vegetable soup. I will post more about each of these later. I am not going to use this bouillon exclusively right now. I just bought a mega-huge container of Knorr chicken bouillon for only $4.98 (WalMart). So I need to use that. But I really do like the idea of making my own bouillon. I like knowing what's in the food I eat. Part of the beauty of cooking from scratch.
My one suggestion. The recipe says to add 1 tablespoon to every quart of water. I would recommend using 1 tsp. to every cup of water.
And by the way: My husband liked this too! He just thought some of the recipes weren't quite flavorful enough. (Note the hint above.)
Nutritional yeast is described here on Wikipedia. It can be bought in bulk bins at WinCo, Smith's Marketplace, and natural food stores.
I like using this bouillon! So far I have used it in stroganof, enchiladas, and vegetable soup. I will post more about each of these later. I am not going to use this bouillon exclusively right now. I just bought a mega-huge container of Knorr chicken bouillon for only $4.98 (WalMart). So I need to use that. But I really do like the idea of making my own bouillon. I like knowing what's in the food I eat. Part of the beauty of cooking from scratch.
My one suggestion. The recipe says to add 1 tablespoon to every quart of water. I would recommend using 1 tsp. to every cup of water.
And by the way: My husband liked this too! He just thought some of the recipes weren't quite flavorful enough. (Note the hint above.)
February 10, 2011
Cinnamon Rolls
 |
| pretty cute, huh? |
 |
| they stuck together |
 |
| this one turned out pretty nice |
I found this idea on Frieda Loves Bread. Mine didn't turn out as well as hers. Part of the problem was because I put the rolls too close together in the pan, so they stuck together as they raised. Anyway, I used the dough recipe from King Arthur Flour, and then just used a whole bunch of melted butter, cinnamon, granulated sugar, brown sugar, and raisins in the filling. And of course I put cream cheese frosting on top. Yum!
February 9, 2011
White Chili
White Chili
Printable Version
½ medium onion, chopped
½ cup green pepper
1 4 oz. can green chilies
2 cloves garlic, minced
2 Tab butter or margarine
2 Tab flour
2 cups chicken broth
½ cup milk
2 cups navy beans
2 cups corn
1 cup cooked chicken, chopped
¼ cup sour cream
1 tsp poultry seasoning (or combination of thyme and rosemary)
1 tsp cumin
salt and pepper
cilantro, if desired
cheese
tortilla chips
Sauté onion and green pepper 1 Tab oil until just tender, adding chilies and garlic for the last minute. Set aside. In soup pot, melt butter; blend in flour and cook briefly. Remove from heat, and stir in broth and milk. Cook over medium heat, stirring continuously, until sauce thickens. Add remaining ingredients and vegetables. Heat through. Season to taste with cilantro, salt, and pepper. Serve with cheese and tortilla chips.
Salsa Variation: Omit green chilies. Add 1/2 cup salsa when putting all ingredients together at the end.
Printable Version
½ medium onion, chopped
½ cup green pepper
1 4 oz. can green chilies
2 cloves garlic, minced
2 Tab butter or margarine
2 Tab flour
2 cups chicken broth
½ cup milk
2 cups navy beans
2 cups corn
1 cup cooked chicken, chopped
¼ cup sour cream
1 tsp poultry seasoning (or combination of thyme and rosemary)
1 tsp cumin
salt and pepper
cilantro, if desired
cheese
tortilla chips
Sauté onion and green pepper 1 Tab oil until just tender, adding chilies and garlic for the last minute. Set aside. In soup pot, melt butter; blend in flour and cook briefly. Remove from heat, and stir in broth and milk. Cook over medium heat, stirring continuously, until sauce thickens. Add remaining ingredients and vegetables. Heat through. Season to taste with cilantro, salt, and pepper. Serve with cheese and tortilla chips.
Salsa Variation: Omit green chilies. Add 1/2 cup salsa when putting all ingredients together at the end.
January 12, 2011
Tortilla Soup
Here's what I had for dinner:
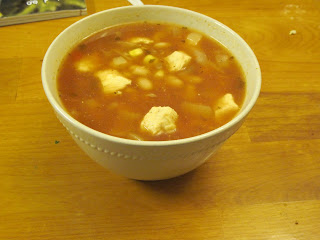 Note: The picture does not do it justice.
Tortilla Soup
Printable version
2 tsp oil
1 lb. boneless, skinless chicken breasts, chopped
1 1/2 cups chopped onion
2 tsp minced garlic
1/2 tsp ground cumin
7 cups water
7 tsp chicken bouillon
2 cups corn
4 cups white beans (2 cans)
2 tsp chili powder
2 cups salsa
2 tab lemon juice
tortilla chips, shredded cheese, sour cream
In a large pot, warm oil over medium heat. Add chicken and onion. Cook until chicken is cooked through and onion is tender. Add garlic and cumin and mix well. Add water, bouillon, corn, beans, chili powder, salsa, and lemon juice. Cook until warm. To serve, break chips into bowl. Pour in soup. Top with cheese and sour cream.

Tortilla Soup
Printable version
2 tsp oil
1 lb. boneless, skinless chicken breasts, chopped
1 1/2 cups chopped onion
2 tsp minced garlic
1/2 tsp ground cumin
7 cups water
7 tsp chicken bouillon
2 cups corn
4 cups white beans (2 cans)
2 tsp chili powder
2 cups salsa
2 tab lemon juice
tortilla chips, shredded cheese, sour cream
In a large pot, warm oil over medium heat. Add chicken and onion. Cook until chicken is cooked through and onion is tender. Add garlic and cumin and mix well. Add water, bouillon, corn, beans, chili powder, salsa, and lemon juice. Cook until warm. To serve, break chips into bowl. Pour in soup. Top with cheese and sour cream.
December 18, 2010
Wheat Berries
So you want to use wheat, but don't have a wheat grinder. You can make wheat berries! It is very simple to cook wheat. Here are a few methods:
Fast Stove-top Method: Heat 2 1/2 cups water and 1 cup wheat to boiling. Reduce heat to low. Cover and simmer 50-60 minutes. Makes about 3 cups of wheat berries.
Slow Stove-top Method: Heat 3 cups water and 1 cup wheat to boiling. Reduce heat to low. Cover and simmer 1/2 hour. Turn off heat and allow wheat to stand, covered 8-12 hours. Drain off any remaining liquid.
Thermos Method: Place 1 cup wheat and 2 1/2 cups boiling water in quart-sized thermos. Screw the top on lightly and leave until morning.
Slow Cooker Method: Place 3 cups water and 1 cup wheat in slow cooker. Cook on HIGH for 2-3 hours. Turn off slow cooker and let sit overnight.
So now what do you do with this wheat? I will admit that I don't use wheat berries a whole lot. I have eaten it as a breakfast cereal, warm, with milk and brown sugar or honey. I have put wheat berries in my meat loaf. That's my extent of wheat berries.
From what I read, though, you can use them in most any recipe to stretch the meat or other grain. Some ideas: use in chili, stroganof, noodle or rice salads, or stuffing.
Most important part: Introduce wheat into your diet slowly. If you do not, you will have severe pain. I believe this is the most important reason to introduce wheat into your diet now in slow amounts.
How do you cook wheat berries? Does anyone cook them in a pressure cooker? How do you eat them?
Coming Up: Red vs. White Wheat
Fast Stove-top Method: Heat 2 1/2 cups water and 1 cup wheat to boiling. Reduce heat to low. Cover and simmer 50-60 minutes. Makes about 3 cups of wheat berries.
Slow Stove-top Method: Heat 3 cups water and 1 cup wheat to boiling. Reduce heat to low. Cover and simmer 1/2 hour. Turn off heat and allow wheat to stand, covered 8-12 hours. Drain off any remaining liquid.
Thermos Method: Place 1 cup wheat and 2 1/2 cups boiling water in quart-sized thermos. Screw the top on lightly and leave until morning.
Slow Cooker Method: Place 3 cups water and 1 cup wheat in slow cooker. Cook on HIGH for 2-3 hours. Turn off slow cooker and let sit overnight.
So now what do you do with this wheat? I will admit that I don't use wheat berries a whole lot. I have eaten it as a breakfast cereal, warm, with milk and brown sugar or honey. I have put wheat berries in my meat loaf. That's my extent of wheat berries.
From what I read, though, you can use them in most any recipe to stretch the meat or other grain. Some ideas: use in chili, stroganof, noodle or rice salads, or stuffing.
Most important part: Introduce wheat into your diet slowly. If you do not, you will have severe pain. I believe this is the most important reason to introduce wheat into your diet now in slow amounts.
How do you cook wheat berries? Does anyone cook them in a pressure cooker? How do you eat them?
Coming Up: Red vs. White Wheat
Subscribe to:
Posts (Atom)