I promised this post to some people several weeks ago. But I'm a slacker! Sorry!
Favorite sourdough websites (click on names to go to the websites; I linked them to where they talk about sourdough):
King Arthur Flour They have great info and recipes
Cultures for Health
Articles with lots of great tips
Kitchen Stewardship
The easy way to make a starter, and recipe links at the bottom of the page
GNOWFGLINS
This link is to a video with information on how to make a starter (and I think some benefits of sourdough?)
Sourdough Home
Basic Information:
How to feed sourdough starter and maintain it in the fridge
Favorite Recipes: (First I must say that these are my favorite recipes. My husband does not like sourdough, at this time. My goal is to become more proficient in it so that it's not quite so sour, and my husband will like it. This will be an ongoing list, so as I find new recipes that I like, or recipes that I like better than the one I have linked here I will change them.)
Bread
Crackers
Crepes (yes, this is the right link-I have never fried them for tortilla chips-my husband does like this recipe)
Pancakes (I like the recipe down near the bottom of this page)
Pizza Crust
Waffles
Do you have a favorite sourdough recipe? Let me know!
Showing posts with label wheat. Show all posts
Showing posts with label wheat. Show all posts
September 3, 2012


February 10, 2012
Baked Oatmeal and Bagels
Just wanted to share a few of my family's new favorite recipes with you.
Baked Soaked Oatmeal-This recipe has become a Saturday morning tradition. Soaking is great for your grains so that you get more nutrition from them. This recipe is adapted from Kelly the Kitchen Kop.
Baked Soaked Oatmeal
Whole Wheat Bagels-I made these bagels a few weeks ago. So good! They take quite a bit effort since I had to broil, boil, and bake them. What a fun treat, though!
Baked Soaked Oatmeal-This recipe has become a Saturday morning tradition. Soaking is great for your grains so that you get more nutrition from them. This recipe is adapted from Kelly the Kitchen Kop.
Baked Soaked Oatmeal
- 2-1/2 c. oats
- 1 T. whole wheat flour (provides phytase to help break down the phytic acid in the oats)
- 1-3/4 c. buttermilk
- ½ c. melted butter, coconut oil, or canola oil
- 4 eggs (or 1/4 cup powdered eggs)
- ½ c. honey, maple syrup, or sugar
- ½ tsp. salt
- 2 tsp. Cinnamon
- 2 tsp. Vanilla
- 2-4 cups fresh or dried fruit (dried apples, raisins, apples, pears, etc.)
- Optional: 2 c. chopped nuts (or sprinkle on each individual serving after baking)
Whole Wheat Bagels-I made these bagels a few weeks ago. So good! They take quite a bit effort since I had to broil, boil, and bake them. What a fun treat, though!
December 1, 2011
Whole Wheat Sourdough
Over the summer I learned to make sourdough. I loved it! I made sourdough bread, pancakes, pizza crust, biscuits, and probably other delicious things too. At the end of the summer things got a little crazy in my life, and sourdough (and breadmaking in general) was one of the first things to go...after this blog. Now that my life is much more in control, I cannot wait to make start another starter, hopefully a few days ago. Wait! That didn't happen!
So here is how to make your own starter. Hopefully I'll share some recipes in a few days.
1. Mix equal parts of wheat flour (or any flour) and water in a quart-sized jar. I started with 1/2 cup of each.
2. Put a napkin over top, and screw it on with a lid. The napkin allows for airflow to get into the jar. The idea with sourdough is that you are getting natural yeasts and healthy bacterias from the air.
3. Set in a warm place.
4. "Feed" the starter twice each day, following steps 1-3. I usually use 1-2 tablespoons of each flour and water at each feeding. Be sure to mix well, making certain to scrape the bottom and sides of the jar.
5. Within 2-4 days you should start to see bubbles. This is all dependent upon things you can and can't control such as temperature. When I started my starter during the summer, I had a lot happier of a starter than I expect to this time. Just do your best to keep it warm. Keep the jar on the stove so that it warms up while your cooking, etc. (Note: When I tried in the future, I found it rather impossible to get good results in the cold winter temperatures. I'll give it another shot, and then I think I'll just have to wait for warmer weather.)
6. You can make crackers in less than a week of starting your starter, but you should probably wait 1-2 weeks prior to making bread, just to make sure your starter is happy (lots of bubbles).
7. When you're ready to make a recipe, take out as much starter as the recipe calls for, then replace with equal parts of flour and water.
Easy! This really only takes about 1 minute of work each day!
I learned how to make sourdough from Kitchen Stewardship. If you don't like my directions, you can check out her's. I also started by using her recipes. Then I got more adventurous.
So here is how to make your own starter. Hopefully I'll share some recipes in a few days.
1. Mix equal parts of wheat flour (or any flour) and water in a quart-sized jar. I started with 1/2 cup of each.
2. Put a napkin over top, and screw it on with a lid. The napkin allows for airflow to get into the jar. The idea with sourdough is that you are getting natural yeasts and healthy bacterias from the air.
3. Set in a warm place.
4. "Feed" the starter twice each day, following steps 1-3. I usually use 1-2 tablespoons of each flour and water at each feeding. Be sure to mix well, making certain to scrape the bottom and sides of the jar.
5. Within 2-4 days you should start to see bubbles. This is all dependent upon things you can and can't control such as temperature. When I started my starter during the summer, I had a lot happier of a starter than I expect to this time. Just do your best to keep it warm. Keep the jar on the stove so that it warms up while your cooking, etc. (Note: When I tried in the future, I found it rather impossible to get good results in the cold winter temperatures. I'll give it another shot, and then I think I'll just have to wait for warmer weather.)
6. You can make crackers in less than a week of starting your starter, but you should probably wait 1-2 weeks prior to making bread, just to make sure your starter is happy (lots of bubbles).
7. When you're ready to make a recipe, take out as much starter as the recipe calls for, then replace with equal parts of flour and water.
Easy! This really only takes about 1 minute of work each day!
I learned how to make sourdough from Kitchen Stewardship. If you don't like my directions, you can check out her's. I also started by using her recipes. Then I got more adventurous.
April 26, 2011
Wheat Bread revisited
Nearly a year ago I posted my wheat bread recipe. Since then I have made some minor adaptations, so I thought I would post it again. If you don't have powdered eggs, just use a regular egg, and realize that you may need to add a little extra flour. With regard to the molasses and honey, I fill a 1/3 cup measuring cup with oil, pour it into my bowl, then use that same measuring cup to measure my molasses and honey. I fill it about 2/3 full of molasses, then fill it the rest of the way with honey. The measurements below are not exact, nor do they equal exactly 1/3 cup.
Whole Wheat Bread
about 6 ½ cups whole wheat flour (I like to use 2 cups red wheat, and the rest white)
1 ¼ T yeast
2 1/3 cups lukewarm water
1 T salt
1 T powdered egg
1/3 cup oil
3 T molasses
2 T honey
1 ¼ T bottled lemon juice
Mix 3 ½ cups flour and yeast together in an electric mixer with dough hook attached. (On a KitchenAid, you should never exceed speed 2 when using the dough hook.) Add water all at once, and mix for one minute, scraping sides as needed. Cover with a dish towel and let rest for 10 minutes. Add salt, powdered egg, oil, molasses, honey, and lemon juice, and mix for one minute. Add a little less than 3 cups of flour, one cup at a time, mixing between each cup. Beat until dough comes away from the sides of the bowl (mostly), about 10 minutes. If after 11 minutes dough has not come away from the edges of the bowl, you may add additional flour, a couple of tablespoons at a time. The dough should feel a little sticky, but soft.
Preheat oven for 1-2 minutes (at any temperature), then turn off oven. Divide dough, and, with oiled hands, place in 2 oiled 8x4 inch bread pans. (You may shape the dough if you wish, but it is not required.) Let rise in warm oven for 15-20 minutes, or until dough reaches the top of the bread pans. Do not remove bread from oven. Turn oven on to 350ºF, and bake for 35 minutes. Remove bread from pans, and cool on racks.
December 29, 2010
Red vs. White Wheat
When you go to buy hard wheat, you sometimes have a choice between red and white wheat. What does this mean, and what is the difference? A lot of people think there is a difference in nutritional value. This is not true. The only difference is that the gene(s) for color are taken out of the white wheat.
Wheat ground into flour looks like this:
You can see a slight difference in the color. (If I knew how to take better pictures, you would be able to tell a bigger difference.)
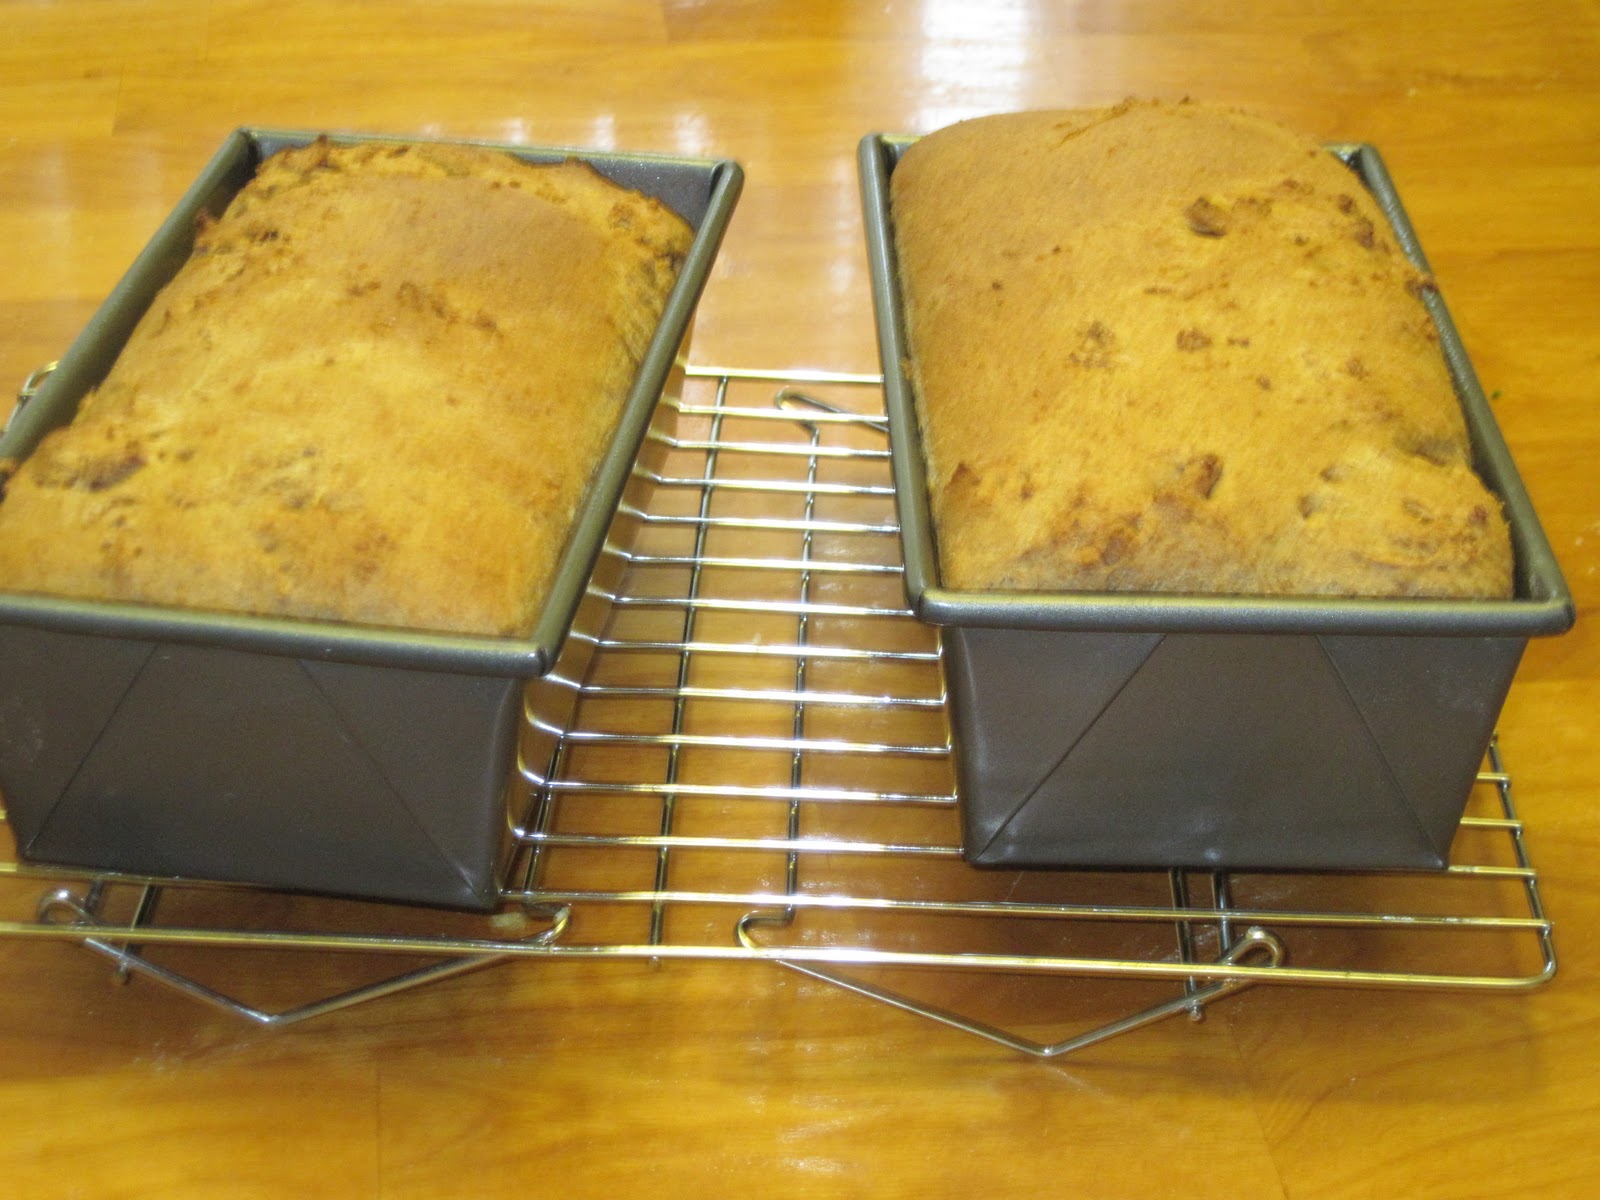
To test how the flours differ when cooking, I made my bread recipe using all white wheat flour in one batch, and all red wheat flour in a second batch.
To sum up the experiment, bread made with white wheat is lighter in color, and has a softer texture than bread made with red wheat. White wheat also rises a little higher. The bread made with red wheat was easier to slice. I typically make this same recipe using part red wheat and part white wheat with good results.
When I use wheat flour in every day recipes such as cookies, pizza dough, or pie crust, I like to use white wheat, because it is lighter in color and texture. It blends in with all-purpose flour better.
Coming Up: Gluten Free Cooking
 |
| red wheat (left) white wheat (right) |
Wheat ground into flour looks like this:
 | |
| red wheat (left), white wheat (right) |
To test how the flours differ when cooking, I made my bread recipe using all white wheat flour in one batch, and all red wheat flour in a second batch.
 | ||
| Bread made with red wheat |
 | ||
| bread made with white wheat |
 | ||
| red wheat (left), white wheat (right) |
When I use wheat flour in every day recipes such as cookies, pizza dough, or pie crust, I like to use white wheat, because it is lighter in color and texture. It blends in with all-purpose flour better.
Coming Up: Gluten Free Cooking
December 23, 2010
Storing Wheat Flour
Sorry, I know I said that I would post about red and white wheat next, but I forgot to talk about storing your wheat flour. A lot of people say that you have to store it in the fridge. Sure, this may be true if your kitchen is 100°, or if you plan to store your flour for 3 years. However, under normal conditions, don't worry about putting it in your fridge. I store mine in an airtight container, and have never had any problems.

By the way, last week when I made pizza, I put used 1/2 cup wheat flour, with 3 1/2 cups white flour. My husband turned up his nose when I saw a slight difference in color in the dough. But then he admitted that he couldn't taste any difference. Success! Next time I'll try a whole cup of wheat!
December 18, 2010
Wheat Berries
So you want to use wheat, but don't have a wheat grinder. You can make wheat berries! It is very simple to cook wheat. Here are a few methods:
Fast Stove-top Method: Heat 2 1/2 cups water and 1 cup wheat to boiling. Reduce heat to low. Cover and simmer 50-60 minutes. Makes about 3 cups of wheat berries.
Slow Stove-top Method: Heat 3 cups water and 1 cup wheat to boiling. Reduce heat to low. Cover and simmer 1/2 hour. Turn off heat and allow wheat to stand, covered 8-12 hours. Drain off any remaining liquid.
Thermos Method: Place 1 cup wheat and 2 1/2 cups boiling water in quart-sized thermos. Screw the top on lightly and leave until morning.
Slow Cooker Method: Place 3 cups water and 1 cup wheat in slow cooker. Cook on HIGH for 2-3 hours. Turn off slow cooker and let sit overnight.
So now what do you do with this wheat? I will admit that I don't use wheat berries a whole lot. I have eaten it as a breakfast cereal, warm, with milk and brown sugar or honey. I have put wheat berries in my meat loaf. That's my extent of wheat berries.
From what I read, though, you can use them in most any recipe to stretch the meat or other grain. Some ideas: use in chili, stroganof, noodle or rice salads, or stuffing.
Most important part: Introduce wheat into your diet slowly. If you do not, you will have severe pain. I believe this is the most important reason to introduce wheat into your diet now in slow amounts.
How do you cook wheat berries? Does anyone cook them in a pressure cooker? How do you eat them?
Coming Up: Red vs. White Wheat
Fast Stove-top Method: Heat 2 1/2 cups water and 1 cup wheat to boiling. Reduce heat to low. Cover and simmer 50-60 minutes. Makes about 3 cups of wheat berries.
Slow Stove-top Method: Heat 3 cups water and 1 cup wheat to boiling. Reduce heat to low. Cover and simmer 1/2 hour. Turn off heat and allow wheat to stand, covered 8-12 hours. Drain off any remaining liquid.
Thermos Method: Place 1 cup wheat and 2 1/2 cups boiling water in quart-sized thermos. Screw the top on lightly and leave until morning.
Slow Cooker Method: Place 3 cups water and 1 cup wheat in slow cooker. Cook on HIGH for 2-3 hours. Turn off slow cooker and let sit overnight.
So now what do you do with this wheat? I will admit that I don't use wheat berries a whole lot. I have eaten it as a breakfast cereal, warm, with milk and brown sugar or honey. I have put wheat berries in my meat loaf. That's my extent of wheat berries.
From what I read, though, you can use them in most any recipe to stretch the meat or other grain. Some ideas: use in chili, stroganof, noodle or rice salads, or stuffing.
Most important part: Introduce wheat into your diet slowly. If you do not, you will have severe pain. I believe this is the most important reason to introduce wheat into your diet now in slow amounts.
How do you cook wheat berries? Does anyone cook them in a pressure cooker? How do you eat them?
Coming Up: Red vs. White Wheat
December 13, 2010
Using Wheat Flour
Back to wheat! The most common way to use wheat is as flour. If you are not accustomed to eating much wheat flour, you should begin by using it in small amounts in recipes you already like. For example, if you have a pancake or cookie recipe you really like, and it calls for 2 cups of flour, substitute 1/4 cup of the flour with wheat flour. As you become accustomed to wheat flour in your recipes, you can add a little more wheat flour.
It's easy and nutritious!
Coming Up: Cooking wheat kernels into berries. This is how you can use wheat if you don't have a grinder!
It's easy and nutritious!
Coming Up: Cooking wheat kernels into berries. This is how you can use wheat if you don't have a grinder!
December 2, 2010
Wheat Grinders
The most common way to use wheat is as flour. But in order to do so you need a wheat grinder. Wheat grinders are a little pricey but worth it. It is a lot more expensive to buy wheat flour than to buy wheat and grind it yourself, so the investment pays for itself quickly. And of course you want to use wheat flour, because it is a lot healthier than white flour. (More coming on that soon.)
I have two wheat grinders: a manual grinder, and an electric. I don't use the manual one very often, because it takes a long time, and manual labor, to grind the wheat. But I have it in case of emergencies. They cost less than $100, most around $60. I have seen them on sale for around $40.

I love my electric grinder, when I use it correctly. I have a Blendtec K-Tec Wheat Grinder. I bought it several years ago because a friend recommended it to me. She had one, and her mom had one that she used for 15 years before she had to get a new one. The other reason I chose this grinder is because of the price. I bought it for less than $200. Most electric wheat grinders cost closer to $300.
I made the comment that I love my grinder when I use it correctly. The reason I say that, is because I have not used it correctly two or three times, and I have had wheat flying around. One time I did not put the lid on all the way, and so the wheat was flying out instead of into the holding container.
Since buying this grinder, I have found this video, and this video that I would recommend watching if you would like more information on this wheat grinder.
Coming Up: Using wheat flour in your recipes.
I have two wheat grinders: a manual grinder, and an electric. I don't use the manual one very often, because it takes a long time, and manual labor, to grind the wheat. But I have it in case of emergencies. They cost less than $100, most around $60. I have seen them on sale for around $40.
I love my electric grinder, when I use it correctly. I have a Blendtec K-Tec Wheat Grinder. I bought it several years ago because a friend recommended it to me. She had one, and her mom had one that she used for 15 years before she had to get a new one. The other reason I chose this grinder is because of the price. I bought it for less than $200. Most electric wheat grinders cost closer to $300.
I made the comment that I love my grinder when I use it correctly. The reason I say that, is because I have not used it correctly two or three times, and I have had wheat flying around. One time I did not put the lid on all the way, and so the wheat was flying out instead of into the holding container.
Since buying this grinder, I have found this video, and this video that I would recommend watching if you would like more information on this wheat grinder.
Coming Up: Using wheat flour in your recipes.
November 27, 2010
Purchasing and Storing Wheat
You can purchase wheat from a variety of locations. I have purchased 45 pounds of wheat in buckets from a local grocery store (Macey's), and 25 pound bags and #10 cans of wheat from Home Storage Centers (LDS Canneries). When I buy the 25 lb. bags, I pour them into 5 gallon buckets with Gamma Lids attached.
I love Gamma Lids. They are air-tight, and easy to open and close, and install onto buckets. The usual price is around $8, but I have bought them several times on sale for less than $5. I have even seen them less than $4 a few times.


I love Gamma Lids. They are air-tight, and easy to open and close, and install onto buckets. The usual price is around $8, but I have bought them several times on sale for less than $5. I have even seen them less than $4 a few times.

November 20, 2010
Nutritional Properties of Wheat
Wheat is so healthy! Eat some today (and tomorrow)!
Wheat is high in fiber, which will help you keep regular, and it contains a large number of vitamins and minerals.
Source: USDA
Wheat is high in fiber, which will help you keep regular, and it contains a large number of vitamins and minerals.
Source: USDA
¼ cup (30 g) | 1 cup (120 g) | |
Calories | 102 | 407 |
Protein | 4.11 g | 16.44 g |
Carbohydrate | 21.77 g | 87.08 g |
Dietary Fiber | 3.7 g | 14.6 g |
Sugars | 0.12 g | 0.49 g |
Total Fat | 0.56 g | 2.24 g |
Saturated Fat | 0.10 g | 0.39 g |
Trans Fat | N/A | N/A |
Cholesterol | 0 mg | 0 mg |
Iron | 1.16 mg | 4.66 mg |
Calcium | 10 mg | 41 mg |
Sodium | 2 mg | 6 mg |
Magnesium | 41 mg | 166 mg |
Potassium | 122 mg | 486 mg |
Vitamin A | 3 IU | 11 IU |
Vitamin A | 0 RAE | 0 RAE |
Vitamin C | 0 mg | 0 mg |
Vitamin E | 0.25 mg | 0.98 mg |
November 16, 2010
Beginning Wheat
When it comes to long-term food storage, wheat is king. Why? Because it stores well, is inexpensive, versatile, and nutritiousness.
Coming Up: Nutritional properties of wheat--Why you should eat wheat today (and tomorrow)
When stored properly, wheat can be stored for over 30 years. To last this long, it must be stored in #10 cans with an oxygen absorber, kept below 75°, and away from water, insects, and rodents.
However, you should not just let wheat sit on your shelf for 30 years. You should use it now. Why?
- Who wants to eat 30 year old food? Bluck!
- You should know how to use it before you have to use it.
- It's nutritious! Eat it every day!
- If you start eating a lot of wheat suddenly, you will get very sick. You need to build up your tolerance gradually.
Coming Up: Nutritional properties of wheat--Why you should eat wheat today (and tomorrow)
June 21, 2010
Child Friendly Wheat Bread
I developed this recipe from my Whole Wheat Bread recipe to be more friendly toward my not-quite 1 year old. I wanted it to not include the honey or egg, and to have less sugar.
Whole Wheat Bread for Children
6 ½ cups whole wheat flour
1 ¼ T yeast
1 tsp baking powder
2 1/3 cups lukewarm water
1 T salt
1/4 cup unsweetened applesauce
3 T oil
2 T brown sugar
1 T molasses
1 ¼ T bottled lemon juice
Mix 3 ½ cups flour, yeast, and baking powder together in an electric mixer with dough hook attached. (On a KitchenAid, you should never exceed speed 2 when using the dough hook.) Add water all at once, and mix for one minute, scraping sides as needed. Cover with a dish towel, and let rest for 10 minutes. Add salt, applesauce, oil, brown sugar, molasses, and lemon juice, and mix for one minute. Add remaining 3 cups of flour, one cup at a time, mixing between each cup. Beat until dough comes away from the sides of the bowl (mostly), about 10 minutes. If after 11 minutes dough has not come away from the edges of the bowl, you may add additional flour, a couple of tablespoons at a time. The dough should feel a little sticky, but soft.
Preheat oven for 1 minute (at any temperature), then turn off oven. Divide dough, and, with oiled hands, place in 2 oiled 8x4 inch bread pans. (You may shape the dough if you wish, but it is not required.) Let rise in warm oven for 10-15 minutes, or until dough reaches the top of the bread pans. Do not remove bread from oven. Turn oven on to 350ºF, and bake for 30 minutes. Remove bread from pans, and cool on racks.
Note: This recipe must be made in an electric mixer. If you make it by hand, you will need to use a lot more flour, which will give you a much tougher dough.
June 2, 2010
Crepes
I love crepes because they are so versatile. They can be be eaten for breakfast, lunch, dinner, snacks, or dessert. The recipe below is for a very basic crepe. If I am making it for dinner, I would use all wheat flour. If I am making the crepes for breakfast or dessert, I would use 1/2 and 1/2 wheat and white flour, and would add a little vanilla, sugar, and cinnamon. If I am making the crepes for someone who eats gluten free, I would use all rice flour.
Crepes
2 eggs
1 1/2 cups milk (4 1/2 tab. powdered milk, 1 1/2 cups water)
1 cup flour (wheat, white, or rice)
1. Put the eggs and milk in a blender, and blend.
2. Add the flour and blend until combined, about 5 seconds, scraping sides of blender as needed.
3. Put the blender in refrigerator, and chill for 30 minutes.
4. Attach blender to base and blend for another few seconds.
5. Heat a small fry pan over medium heat until hot.
6. Grease fry pan (even if it is non-stick).
7. Take the fry pan off the heat, and pour a small amount of batter into fry pan, while rotating the pan so that the batter will cover the entire pan. If you pour too much batter in, pour the excess batter back into the blender.
8. Cook over medium heat for about 30 seconds.
9. Flip the crepe over and cook for an additional 15 seconds.
10. Serve with your favorite fillings and/or toppings.
Fillings/Toppings
applesauce, peanut butter, pureed fruit, berries, peaches, chicken, fish, ham, steamed vegetables, cheese, cottage cheese, white sauce, powdered sugar, lemon juice, pudding
My favorite dinner filling: cottage cheese and canned salmon, topped with a thin white sauce with garlic powder, parsley, rosemary, and pepper mixed in.
Crepes
2 eggs
1 1/2 cups milk (4 1/2 tab. powdered milk, 1 1/2 cups water)
1 cup flour (wheat, white, or rice)
1. Put the eggs and milk in a blender, and blend.
2. Add the flour and blend until combined, about 5 seconds, scraping sides of blender as needed.
3. Put the blender in refrigerator, and chill for 30 minutes.
4. Attach blender to base and blend for another few seconds.
5. Heat a small fry pan over medium heat until hot.
6. Grease fry pan (even if it is non-stick).
7. Take the fry pan off the heat, and pour a small amount of batter into fry pan, while rotating the pan so that the batter will cover the entire pan. If you pour too much batter in, pour the excess batter back into the blender.
8. Cook over medium heat for about 30 seconds.
9. Flip the crepe over and cook for an additional 15 seconds.
10. Serve with your favorite fillings and/or toppings.
Fillings/Toppings
applesauce, peanut butter, pureed fruit, berries, peaches, chicken, fish, ham, steamed vegetables, cheese, cottage cheese, white sauce, powdered sugar, lemon juice, pudding
My favorite dinner filling: cottage cheese and canned salmon, topped with a thin white sauce with garlic powder, parsley, rosemary, and pepper mixed in.
May 26, 2010
Wheat Bread
I created this recipe by combining several other recipes, because I wanted a wheat bread recipe that was quick, easy, did not include a lot of unusual ingredients, and that was light. In the process I learned several things about wheat bread. First, if you want 100% wheat bread to be light, you have to use an electric mixer with a dough hook. Otherwise, you have to add a lot more flour. Second, unlike when making white bread, you add the flour then 10 minutes later it comes away from the sides of the bowl. (When making white bread in a KitchenAid, you keep adding flour until the dough comes away from the sides of the bowl.)
Recipe revisited here.
Recipe revisited here.
Whole Wheat Bread
6 ½ cups whole wheat flour
1 ¼ T yeast
2 1/3 cups lukewarm water
1 T salt
1 egg
1/3 cup oil
2 T + 2 tsp molasses (or honey)
2 T + 2 tsp honey
1 ¼ T bottled lemon juice
Remove egg from refrigerator and set on counter. Mix 3 ½ cups flour and yeast together in an electric mixer with dough hook attached. (On a KitchenAid, you should never exceed speed 2 when using the dough hook.) Add water all at once, and mix for one minute, scraping sides as needed. Cover with a dish towel and let rest for 10 minutes. Add salt, egg, oil, molasses, honey, and lemon juice, and mix for one minute. Add remaining 3 cups of flour, one cup at a time, mixing between each cup. Beat until dough comes away from the sides of the bowl (mostly), about 10 minutes. If after 11 minutes dough has not come away from the edges of the bowl, you may add additional flour, a couple of tablespoons at a time. The dough should feel a little sticky, but soft.
Preheat oven for 1 minute (at any temperature), then turn off oven. Divide dough, and, with oiled hands, place in 2 oiled 8x4 inch bread pans. (You may shape the dough if you wish, but it is not required.) Let rise in warm oven for 10-15 minutes, or until dough reaches the top of the bread pans. Do not remove bread from oven. Turn oven on to 350ºF, and bake for 30 minutes. Remove bread from pans, and cool on racks.
Subscribe to:
Posts (Atom)